Follow Me On Social Media!
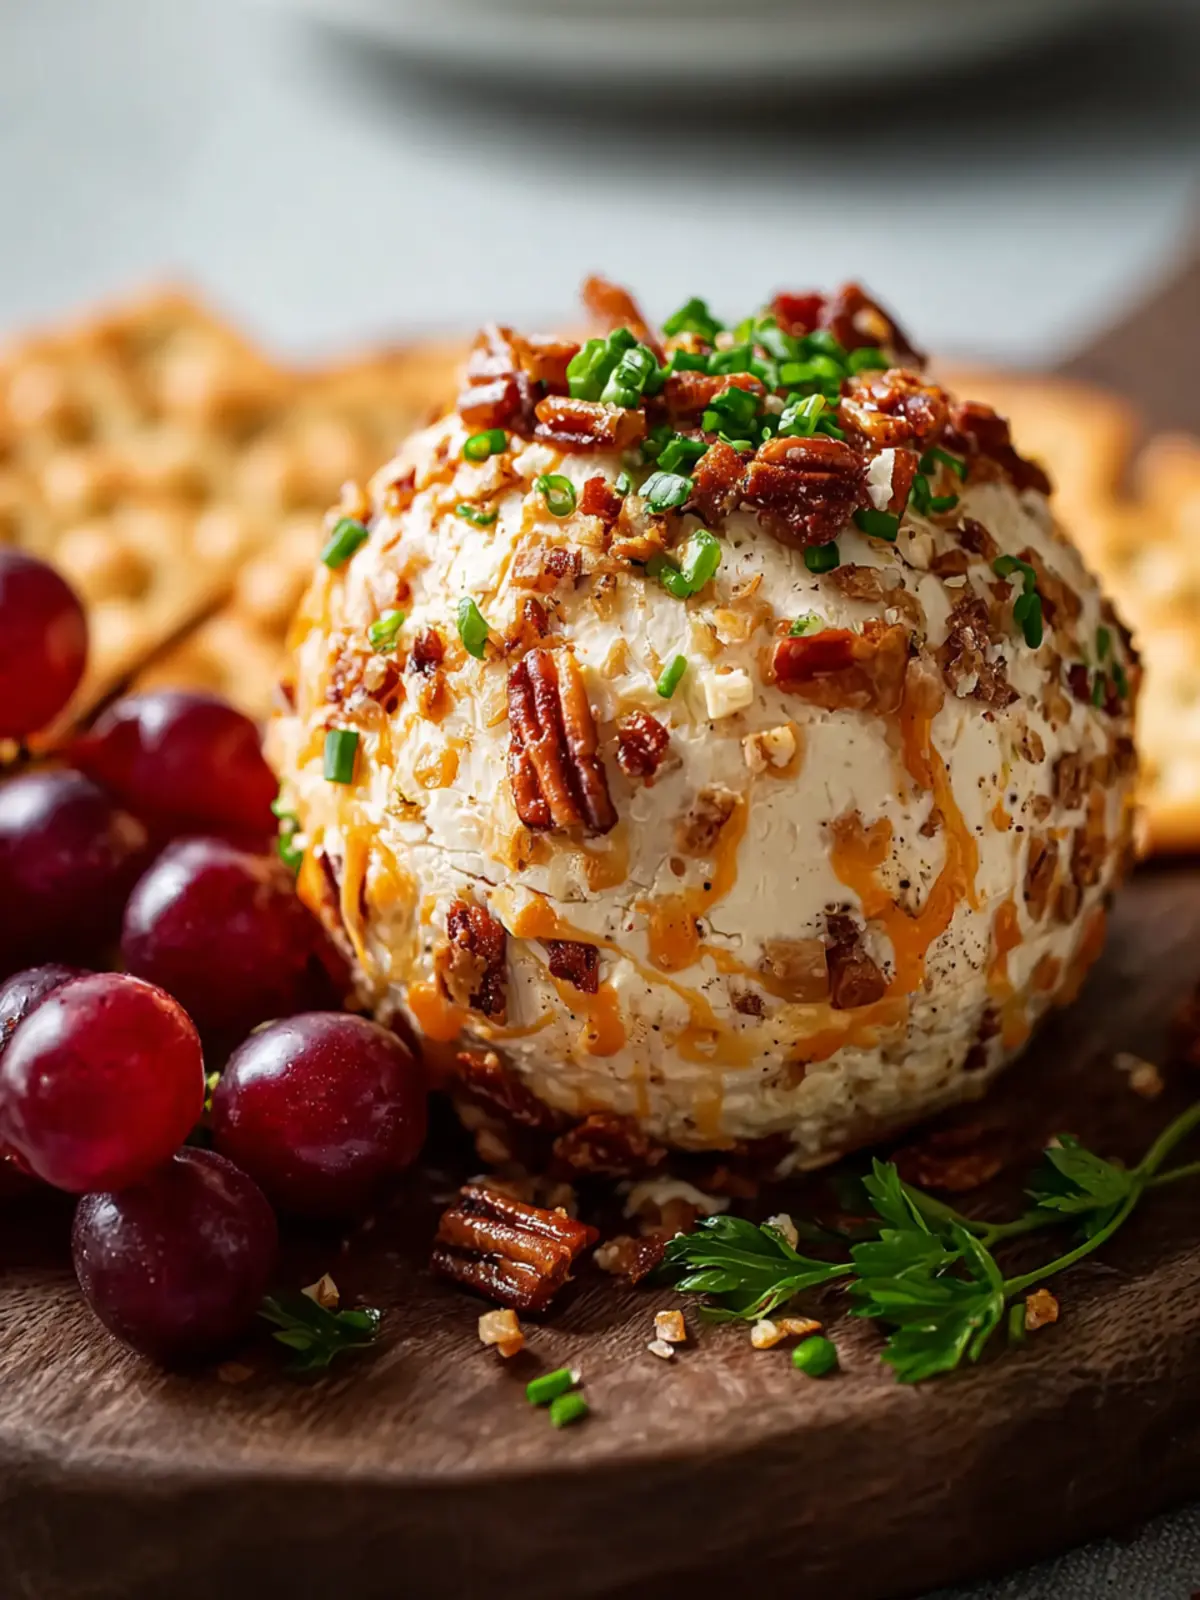
Cheese Ball Recipe: The Best Creamy Snack for Any Gathering
Introduction to Cheese Ball Recipe
Crafting a delightful cheese ball recipe is a wonderful way to add a touch of homemade warmth to any gathering. I still remember the first time I made a cheese ball for a friends’ game night. The excitement of mixing creamy cheese with savory herbs and spices made me feel like a culinary artist. With just a few simple ingredients, you can create a crowd-pleasing snack that pairs beautifully with crackers, vegetables, or even crusty bread.
The joy of sharing homemade snacks
Imagine walking into a room filled with laughter and chatter, a beautifully crafted cheese ball sitting in the center, surrounded by eager guests dipping into it with crunchy crackers. Snacks, especially those made at home, have a unique way of bringing people together. The aroma of garlic and herbs mingling in the air not only tantalizes the taste buds but also stirs up memories of family gatherings or cozy nights with friends. There’s something inherently charming about preparing snacks from scratch—it shows you care.
When you serve your homemade cheese ball, you’re not just putting food on the table; you’re offering a piece of your creativity and warmth. It’s as much about the flavor as it is about the experience of sharing it with others. Whether it’s a festive holiday party, a casual afternoon get-together, or a simple weeknight treat, a cheese ball adds a fun and personal touch.
Plus, there’s so much room for creativity with a cheese ball. You can customize your ingredients to suit your taste—whether you prefer bold flavors like spicy jalapeños or milder options like roasted red pepper. It’s completely versatile!
So, whether you’re looking to impress your friends or simply enjoy a special moment at home, this cheese ball recipe is a delightful way to get started. Let’s dive into the ingredients and whisk up some cheesy magic!
Key Ingredients for Cheese Ball Recipe
Crafting the perfect cheese ball recipe often feels like a delightful dance in the kitchen, where the right ingredients come together harmoniously to create a show-stopping appetizer. Here’s what you’ll need to make your cheese ball truly exceptional.
Cream Cheese: The base of any great cheese ball, I recommend using full-fat cream cheese for its rich and velvety texture. It provides the necessary creaminess and is easier to blend with the other ingredients.
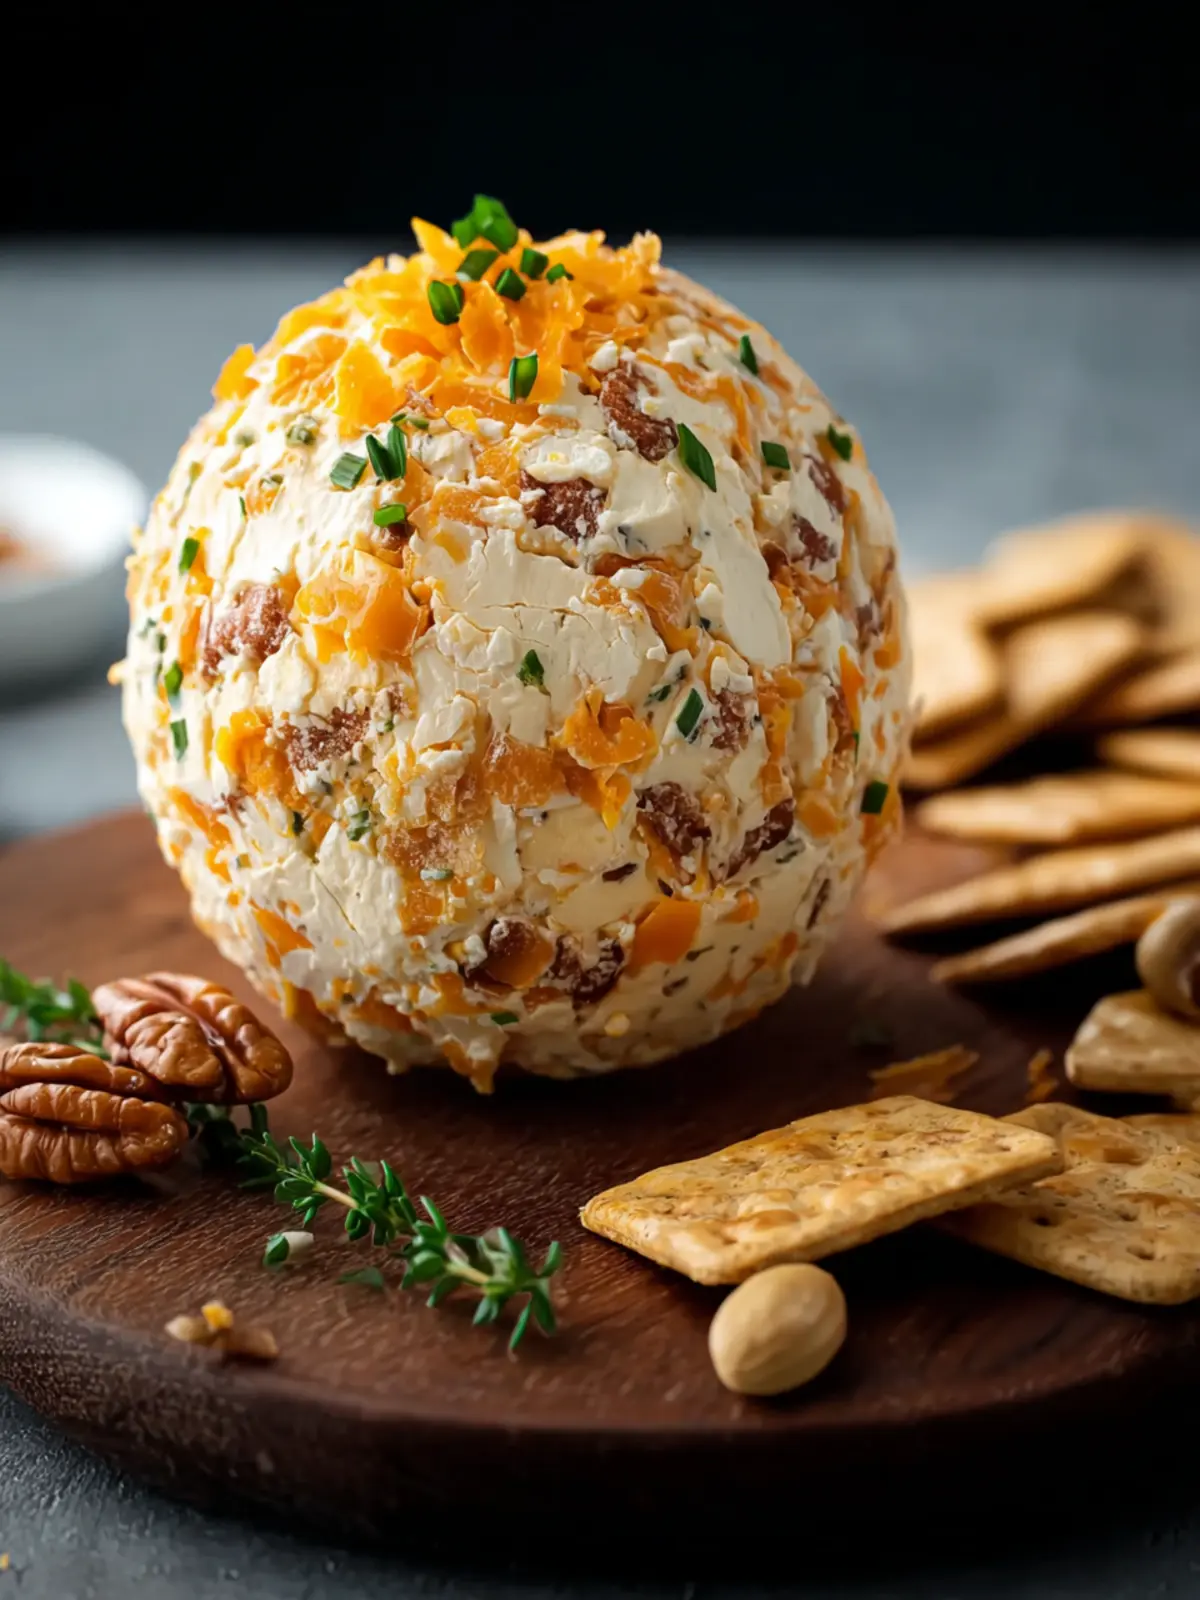
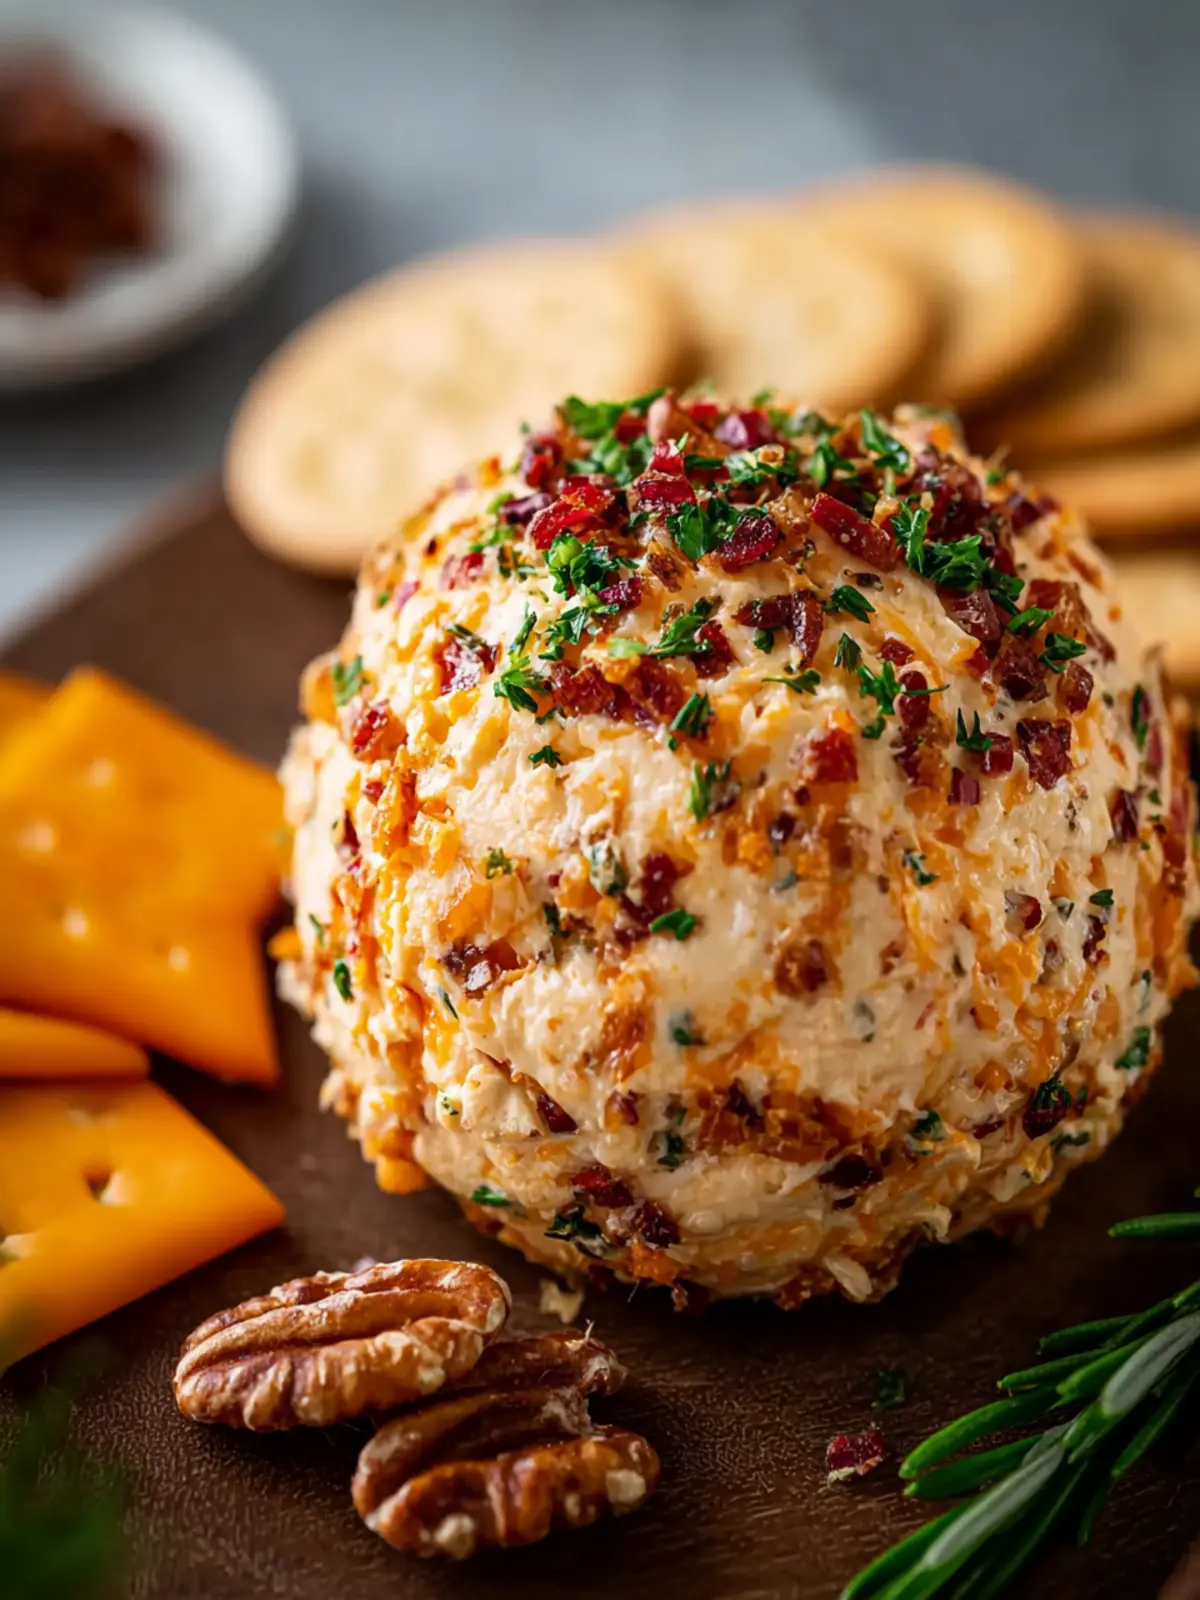
Shredded Cheese: A mix of sharp cheddar and Monterey Jack gives your cheese ball its savory punch. The melting qualities of these cheeses create a delicious flavor profile that keeps guests coming back for more.
Chopped Green Onions: Adding fresh green onions introduces a zesty brightness to your cheese ball. Their crunch and subtle onion flavor beautifully complement the creaminess of the cheese.
Garlic Powder: You can’t go wrong with a dash of garlic powder. It adds depth and a robust flavor without overpowering the other ingredients.
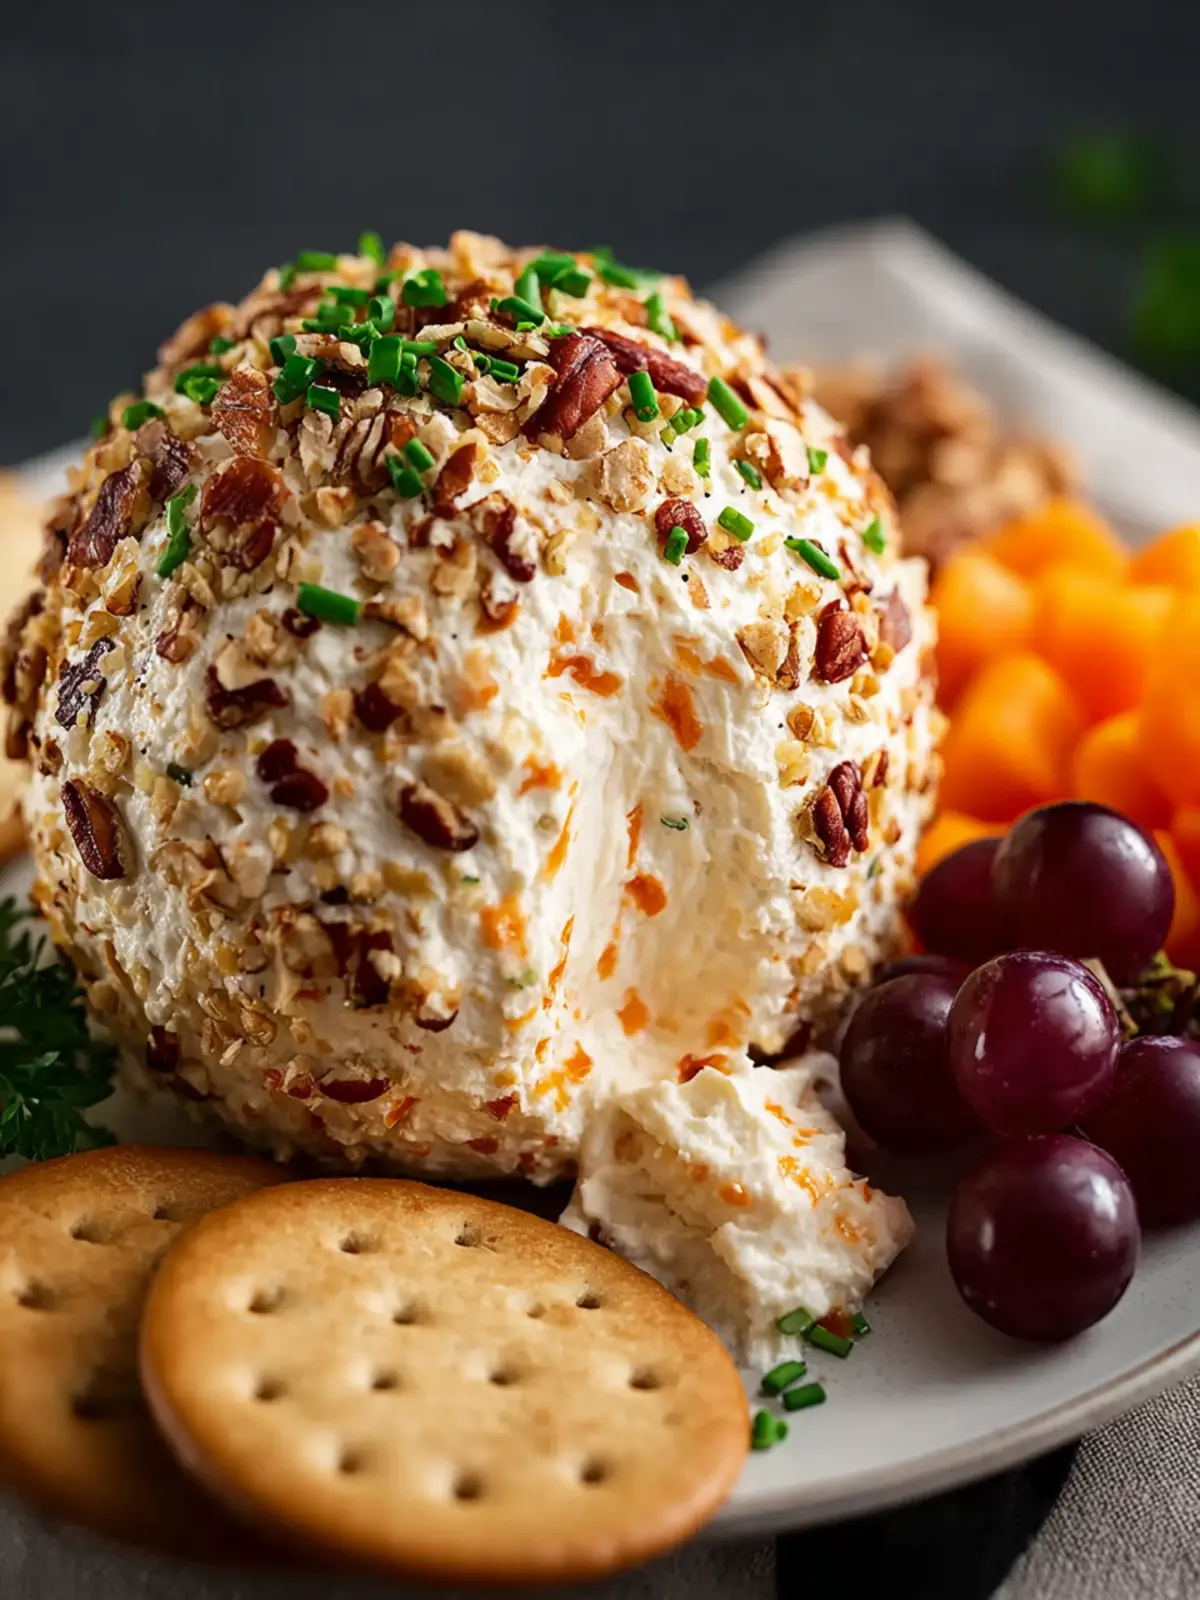
Nuts: Chopped walnuts or pecans create an enticing texture on the outside of the cheese ball. They add an earthy crunch that contrasts wonderfully with the creamy center.
Embrace these ingredients, and watch your cheese ball become the star of the show!
Why You’ll Love This Cheese Ball Recipe
A cheese ball recipe often conjures up memories of festive gatherings, where laughter mingles with the savory aroma of perfectly blended cheese. This particular cheese ball is not just a dish; it’s a centerpiece that brings people together. Imagine a cozy evening in with friends, the hustle and bustle of daily life melting away as you dip crackers into a creamy, flavorful cheese ball. It’s a delightful way to elevate any gathering.
What makes this cheese ball so special? For starters, it’s incredibly versatile. You can customize it based on your favorite flavors or seasonal ingredients, whether you prefer herbs, spices, or a hint of sweetness. The simple preparation means you can whip it up in no time, leaving you more moments to enjoy with loved ones.
The cheese ball can be made ahead and stored in the refrigerator, allowing the flavors to deepen and develop. Plus, it’s undeniably impressive! Presenting this cheese ball on a charcuterie board adds a touch of elegance to your appetizer spread. Once you serve this recipe, you’ll find everyone reaching for seconds—and that’s the kind of joy this cheese ball is made to share.
Variations on the Classic Cheese Ball Recipe
A cheese ball recipe is a delightful centerpiece for any gathering, but have you ever considered giving it a twist? Whether you’re aiming for a flavor explosion or dietary accommodation, variations on the classic cheese ball can cater to every palate.
Sweet and Savory Blend
Combining flavors can elevate your cheese ball. For a sweet touch, mix in dried cranberries or apricots alongside your usual ingredients. Their slight tartness pairs beautifully with creamy cheese, creating a delightful contrast.
Herb and Spice Infusion
Feeling adventurous? Experiment with fresh herbs like dill, chives, or thyme. Adding these fresh elements can brighten the cheese ball, especially if you mix in some garlic for an extra kick. You might just find yourself stealing bites before your guests arrive!
Nutty Crunch
If you love texture, consider rolling your cheese ball in crushed nuts such as pecans, almonds, or walnuts. Not only does this add a satisfying crunch, but the nutty flavor complements the creaminess of the cheese perfectly.
International Flair
For those looking to spice things up, how about turning your cheese ball into something with an international twist? Incorporate spices such as curry powder for an Indian flair or feta cheese and olives for a Mediterranean vibe.
Each variation of this cheese ball recipe not only diversifies your snack options; they create a memorable experience for you and your guests. So, the next time you whip up this crowd-pleasing snack, don’t hesitate to get creative!
Cooking Tips and Notes for Cheese Ball Recipe
Creating the perfect cheese ball recipe is a delightful journey that combines taste, texture, and a touch of creativity. This popular appetizer is not only versatile but also super fun to make, whether you’re hosting a get-together or just indulging in a cozy night at home.
Selecting the Right Cheeses
Choosing the right cheese is crucial for a creamy and flavorful cheese ball. A combination of cream cheese and sharp cheddar offers a rich base, while adding a hint of tang. Feel free to experiment with cheeses like goat cheese or smoked gouda for a unique twist.
Flavor Additions
While the basic cheese ball recipe is delicious on its own, consider adding diced herbs or spices for a flavor boost. Chopped chives, garlic powder, or even crushed red pepper can elevate your cheese ball. Remember to taste as you mix, adjusting to your preference!
Rolling Techniques
When it comes to rolling your cheese ball in nuts or herbs, make sure your hands are slightly damp to avoid sticking. A cold cheese ball is easier to handle, so chilling it before rolling can help maintain its shape.
Storage Tips
Store any leftovers tightly wrapped in the fridge. To maintain the best flavor, consume within a few days. This ensures that your cheese ball stays fresh for your next munching session!
Your cheese ball recipe is now ready to impress your guests or satisfy your late-night snack cravings! Enjoy the creative process!
Serving Suggestions for Cheese Ball Recipe
Imagine the scene: you’ve just whipped up a delicious cheese ball recipe, and now it’s time to serve your culinary creation. This versatile appetizer can be the star of any gathering, whether it’s a casual get-together with friends or a festive holiday party. Here are some creative ways to present your cheese ball:
Classic Dippers
- Crackers: Choose a variety of textures and flavors, from buttery to whole grain. These add a nice crunch and balance the creamy richness of the cheese ball.
- Vegetable Sticks: Think celery, carrots, and bell peppers. Their freshness complements the flavors in your cheese ball and adds a colorful touch.
Pairing with Fruits
- Fruits: Slices of apple, pear, or grapes tangibly contrast with the cheesiness, bringing sweetness to each bite. Try creating a fruit platter alongside your cheese ball—it’s visually appealing and delicious!
Accompaniments
- Honey or Jam: A drizzle of honey or a dollop of your favorite jam can elevate the flavor, adding a sweet note that pairs beautifully with savory cheese.
- Nuts: Serve alongside toasted nuts like almonds or pecans for an extra layer of flavor and crunch.
These serving ideas are sure to impress your guests and turn your cheese ball into an unforgettable centerpiece!
Time Breakdown for Cheese Ball Recipe
Creating the perfect cheese ball requires some thoughtful time management, ensuring you enjoy every delicious bite. Let’s break down the timing so you can plan efficiently for your next gathering.
Preparation Time
Getting started with your cheese ball recipe is quick and easy! You’ll need about 15-20 minutes to gather your ingredients, mix everything together, and shape it into a delightful ball.
Refrigeration Time
Once you’ve formed the cheese ball, it’s time for the crucial refrigeration phase. Chill it for at least 2 hours, allowing the flavors to meld beautifully and the texture to firm up.
Total Time
In total, you’re looking at around 2 hours and 20 minutes from start to finish, which includes both prep and chilling. This little investment of time will reward you with a creamy and flavorful cheese ball that’s sure to impress!
Nutritional Facts for Cheese Ball Recipe
When you bring a cheese ball recipe to your next gathering, not only do you surprise and delight your guests, but you also introduce them to a crowd-pleasing snack that rarely disappoints. Let’s break down the nutritional facts to appreciate what’s inside this delicious treat.
Calories
A typical serving of this cheese ball contains approximately 100 calories. This makes it a fun option to indulge in without overdoing it.
Protein
Cheese is a fantastic source of protein, providing about 7 grams per serving. This makes the cheese ball not just tasty, but also a helpful addition to your protein intake.
Sodium
However, keep an eye on the sodium content, which can be around 200 mg per serving. If you’re watching your salt intake, consider choosing lower-sodium cheese varieties to keep it balanced while enjoying this flavorful snack.
FAQs about Cheese Ball Recipe
Making a delightful cheese ball recipe can be an extraordinary addition to your gathering, but you might have some questions before diving in. Here, we address commonly asked questions to help you impress everyone at your next get-together.
Can I make the cheese ball ahead of time?
Absolutely! One of the best aspects of a cheese ball recipe is its make-ahead potential. You can prepare your cheese ball up to two days in advance. This not only saves you time on the day of your event but also allows the flavors to meld beautifully. Just wrap the cheese ball tightly in plastic wrap and store it in the refrigerator. When it’s time to serve, roll it in your desired coating for an added crunch!
What are some variations on flavors?
The beauty of a cheese ball lies in its versatility. You can easily switch up the flavors to suit your taste or theme. Here are some delicious variations:
- Herb and Garlic: Add finely chopped fresh herbs like chives, parsley, and roasted garlic.
- Spicy Southwest: Include diced jalapeños, chili powder, and lime juice.
- Sweet and Savory: Mix in dried cranberries or apricots with some nuts for a sweet touch.
- Classic Bacon Ranch: Fold in crumbled bacon and ranch seasoning for a crowd-pleaser.
Feel free to experiment—your taste buds will thank you!
How should I store leftover cheese ball?
If you end up with leftover cheese ball (which is quite a feat), storing it properly is key. Wrap any uneaten portions tightly in plastic wrap or place them in an airtight container. This way, you can enjoy your cheese ball for up to a week in the refrigerator. Just remember to let it sit at room temperature for about 30 minutes before serving to regain its creamy texture! Enjoy!
Conclusion on Cheese Ball Recipe
This delicious cheese ball recipe brings together the best of creamy, savory flavors, making it a perfect addition to any gathering. Picture this: friends gathered around, laughter in the air, and the rich aromas wafting from your kitchen. With just a handful of ingredients—cream cheese, garlic powder, and shredded cheese—your cheese ball can take center stage, paired with an array of crunchy crackers or fresh veggies. Not only is it simple to make, but it’s also highly customizable. So, go ahead, experiment with your favorite additions, and watch it become a star player at your next event!
Print
Cheese Ball
- Total Time: 45 minutes
- Yield: 8 servings 1x
- Diet: Vegetarian
Description
A creamy and flavorful cheese ball, perfect for gatherings and snacks.
Ingredients
Scale
- 200 g cream cheese (softened at room temperature)
- 150 g shredded sharp cheddar cheese (for flavor and meltability)
- to taste salt (optional, adjust as needed)
- 1 tsp Worcestershire sauce (optional, adds depth)
- 2 tbsp chopped herbs (such as chives, parsley, or paprika)
- 100 g toasted nuts (finely chopped, like almonds or pecans)
Instructions
- Place the softened cream cheese in a mixing bowl and stir until smooth and creamy, with no lumps.
- Add the shredded cheddar cheese to the cream cheese and mix well, ensuring the cheeses are evenly combined.
- Stir in a pinch of salt and a splash of Worcestershire sauce, then add your chopped herbs for flavor. Mix everything thoroughly until well incorporated.
- Cover the mixture with plastic wrap and refrigerate for at least 30 minutes to firm up, making it easier to shape.
- Once chilled, scoop the mixture with a spoon or scoop and gently roll it between your hands to form a smooth, round ball about the size of a tennis ball.
- Pour the toasted nuts onto a plate and roll the cheese ball in them, pressing gently so the coating sticks evenly all over.
- Wrap the coated cheese ball tightly in plastic wrap again and refrigerate for another 30 minutes to allow flavors to meld.
- Remove the cheese ball from the fridge, let it sit at room temperature for about 10 minutes, then serve with crackers, baguette slices, or veggie sticks for a perfect snack.
Notes
- This cheese ball can be made ahead of time and stored in the refrigerator.
- Serve with your favorite crackers or fresh veggies for dipping.
- Prep Time: 15 minutes
- Category: Appetizer
- Method: No cook
- Cuisine: American
Nutrition
- Serving Size: 1 serving
- Calories: 150
- Sugar: 1 g
- Sodium: 200 mg
- Fat: 12 g
- Saturated Fat: 7 g
- Unsaturated Fat: 4 g
- Trans Fat: 0 g
- Carbohydrates: 2 g
- Fiber: 0 g
- Protein: 6 g
- Cholesterol: 30 mg